
A concrete test specimen is a sample of fresh concrete cast in a 10 × 20 cm or 15 × 30 cm cylinder, or in a 15 × 15 × 50 cm prism. It is consolidated in layers, moist-cured at (23 ± 2) °C and broken at a set age, usually 7 and 28 days, to check whether the delivered concrete reaches the strength specified in the design. Molding and curing follow ABNT NBR 5738:2015 (the Brazilian standard for molding and curing concrete specimens). Compression testing follows NBR 5739:2018 (the Brazilian standard for concrete compression testing, equivalent to ASTM C39). How many specimens to mold is set by NBR 12655 (the Brazilian standard for concrete preparation, control and acceptance). These are the figures that size the press: a 10 × 20 cylinder of 30 MPa concrete breaks at about 236 kN, and a 15 × 30 cylinder of the same concrete breaks at about 530 kN.
In short:
- Cylinders: the height is twice the diameter. The 10 × 20 has a cross-section of 78.54 cm² and the 15 × 30 has 176.71 cm². The diameter must be at least three times the maximum size of the coarse aggregate.
- Hand molding: 2 layers of 12 strokes for the 10 × 20 and 3 layers of 25 strokes for the 15 × 30, using a 16 mm steel tamping rod.
- Curing: at least 24 h in the mold (48 h for the prism), then in saturated calcium hydroxide solution or a moist room at (23 ± 2) °C until testing.
- How many to mold: there is no rule per cubic meter. NBR 12655 works with the test sample ("exemplar"), made of two specimens per age, and with lots of concrete.
- Result: of each pair of specimens, the higher value counts, not the average.
The general concept of a test specimen for metals, plastics and other materials is covered in the article on the test specimen. This article deals only with concrete, in the order of the specimen's life: what it measures, its shape, the mold, molding, curing, end preparation, testing, quantity and how to read the result.
What a concrete test specimen is and what it measures
The test specimen is the part of the concrete that goes to the laboratory in place of the structure. On delivery, a sample is taken from the ready-mix truck or the site mixer, placed in standard molds, consolidated and cured under controlled conditions. Weeks later the specimens are broken in a press or a universal testing machine, and the maximum force divided by the cross-sectional area gives the compressive strength of the concrete, fc, in MPa. Testing is usually done by a concrete quality control laboratory, preferably accredited by Cgcre/Inmetro (Brazil's accreditation body) to ABNT NBR ISO/IEC 17025.
The point that changes how the result is read is this: the specimen measures the potential strength of the delivered concrete, not the strength of the structure. It is consolidated by a fixed method, cured submerged or in a moist room at constant temperature, and broken at an exact age. In the structure, the concrete was placed and vibrated differently and cured in sun, wind and cold. Standardizing everything that happens after mixing is what makes it possible to compare one truck with another and one ready-mix supplier with another: if the result is low, the difference has to be in the concrete, not in how the specimen was treated.
The reference value is fck, the characteristic strength the designer specifies at 28 days. The statistical meaning of fck is explained in the guide to the compression test. Three Brazilian standards cover the path from the truck to the test report:
- ABNT NBR 5738:2015: how to mold and cure cylindrical and prismatic specimens and how to prepare the cylinder ends before testing. It does not apply to zero-slump concrete or dry mixes, such as those for pipes, blocks, dams and roller-compacted concrete.
- ABNT NBR 5739:2018: how to break the cylinder in compression and calculate fc.
- ABNT NBR 12655: how many specimens to mold, how to group them and when a lot of concrete is accepted.
There are two other concrete specimens that should not be confused with the one molded for acceptance. The first is the field-cured specimen, also covered by NBR 5738, which is used to assess whether the protection and curing on site were adequate; it appears in the section on curing. The second is the core, a cylinder drilled from the finished structure according to NBR 7680-1 (the Brazilian standard for extracting and testing concrete cores), used when the concrete was not accepted on the basis of the molded specimens.
Types and dimensions: 10 × 20 cylinder, 15 × 30 cylinder and prism
NBR 5738 provides for two shapes. The cylindrical specimen, broken in compression, has a height equal to twice the diameter. The diameter may be 10, 15, 20, 25, 30 or 45 cm, with a tolerance of 1% on the diameter and 2% on the height. In concrete quality control practice, almost everything is 10 × 20 cm or 15 × 30 cm. The prismatic specimen, with a square cross-section, is broken in bending and is used to measure flexural tensile strength. The standard calls the cylinder diameter or the smallest edge of the prism the basic dimension, and this is what sets the minimum size and the number of layers. The 150 mm cube, common in non-Brazilian texts, is a specimen of the European standard EN 12390-1 and is not covered by NBR 5738.
The minimum size comes from the aggregate: the basic dimension must be at least three times the nominal maximum size of the coarse aggregate in the concrete. The reason is physical. A large stone in a small mold takes up a significant share of the cross-section, creates voids along the wall where the concrete cannot surround it, and makes the result depend on where the stone happened to fall. With the 3:1 ratio, the specimen represents concrete as a material and not as a set of isolated stones. In practice, the 10 × 20 is suitable for aggregate up to 33 mm (100/3) and the 15 × 30 for up to 50 mm. Particles larger than the nominal maximum size occasionally found in the sample are removed by sieving.
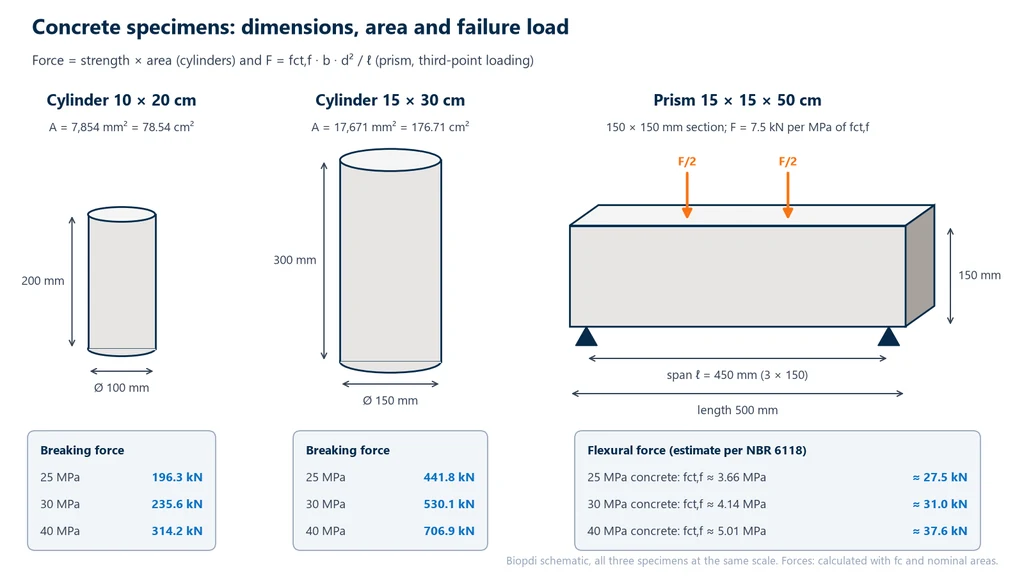
Within this rule, the choice between 10 × 20 and 15 × 30 comes down to logistics and equipment. The 15 × 30 has 3.375 times the volume of the 10 × 20 (5.3 L vs 1.6 L): with concrete at about 2,400 kg/m³, it weighs close to 12.7 kg, against 3.8 kg for the smaller one. The cross-sectional area is 2.25 times larger, and that is what matters for the press: for the same strength, the 15 × 30 needs 2.25 times the force. This is why the 10 × 20 became the standard on job sites with ordinary aggregate, while the 15 × 30 is kept for larger aggregates and for tests that call for a larger specimen, such as the modulus of elasticity of concrete.
The prism follows Table 1 of NBR 5738, which links the basic dimension to the minimum length and to the span of the flexural test in NBR 12142 (the Brazilian standard for flexural tensile strength of concrete prisms). The minimum cross-section is 100 mm, and the dimensional tolerance is below 2%, not exceeding 2 mm:
| Basic dimension of the prism | Minimum length | Test span |
|---|---|---|
| 100 mm | 350 mm | 300 mm |
| 150 mm | 500 mm | 450 mm |
| 250 mm | 800 mm | 750 mm |
| 450 mm | 1,400 mm | 1,350 mm |
In every row the span is three times the basic dimension, and the length leaves 25 mm beyond each support. The usual size is 150 mm: 15 × 15 × 50 cm, with a 450 mm span.
The force that breaks each specimen is the strength multiplied by the cross-sectional area, and this is what sets the capacity of the machine. The diagram below draws the three specimens to the same scale, with dimensions, area and breaking force for 25, 30 and 40 MPa concrete. For the prism, the force comes from the third-point loading flexure formula; since flexural tensile strength is not measured on the cylinder, the values in the chart are an estimate based on the relationships in NBR 6118 (the Brazilian code for design of concrete structures) and serve only as an order of magnitude: between 27 and 38 kN, far below the cylinders.
The mold: what NBR 5738 requires
The mold is the container in which fresh concrete takes the shape of the specimen. One of the most searched questions on the topic in Brazil is the "price of a concrete test specimen", and the answer depends on what is being bought: the mold, which is laboratory equipment, or the test, which is a service. Prices vary by supplier and are not covered here. What the standard sets are the requirements the mold must meet, and these are what separate a mold that lasts for years from one that compromises the result:
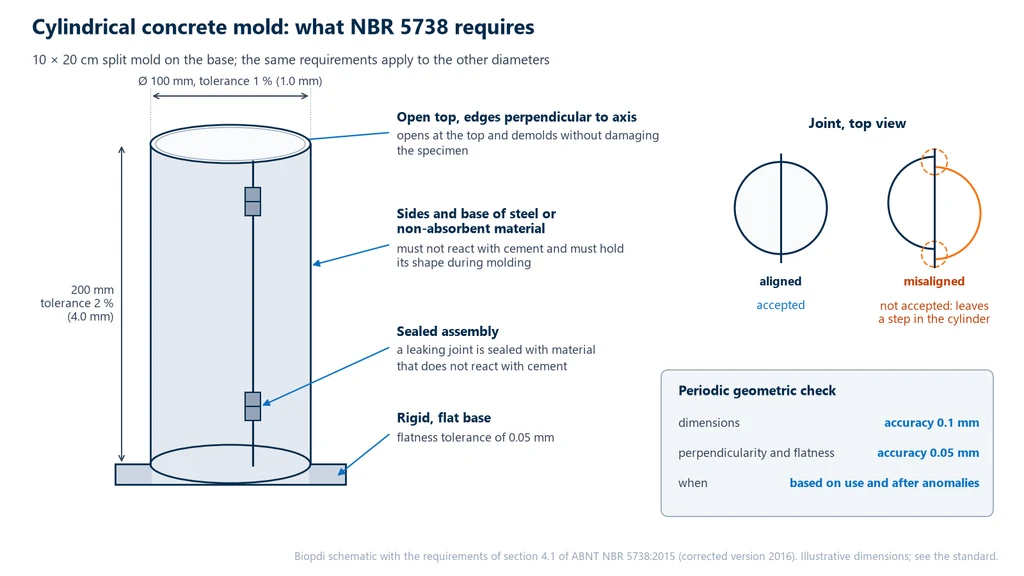
- Material: sides and base made of steel or another non-absorbent material that does not react with cement and holds its shape during molding. A mold that absorbs water draws water from the concrete next to the wall.
- Base: rigid and flat, with a flatness tolerance of 0.05 mm, because the bottom face of the cylinder becomes one of the bearing ends in the test.
- Watertightness: the mold and base assembly must not leak water; leaking joints are sealed with a material that does not react with cement.
- Seam alignment: split cylindrical molds whose seam edges are misaligned are not accepted, as they would leave a step along the cylinder.
- Periodic geometric check: dimensions are checked to an accuracy of 0.1 mm, and perpendicularity and flatness to 0.05 mm, at a frequency that depends on use and whenever there is an anomaly.
The standard does not prohibit plastic: it prohibits material that is absorbent, reactive or that deforms. The difference between steel and plastic lies in service life and in keeping the geometry over hundreds of demoldings, which is exactly what the geometric check verifies. Before each molding, the mold and base receive a thin coat of mineral oil or another release agent that does not react with cement: any excess runs to the bottom and mixes into the concrete at the base.
The diagram below brings these requirements together in a split 10 × 20 cm mold: the tolerances of 1% on the diameter (1.0 mm) and 2% on the height (4.0 mm), the rigid base with 0.05 mm flatness and the watertight joint. The top view on the right shows the defect the standard rejects: the two halves with misaligned seam edges, leaving a step along the cylinder.
How to mold the test specimen per NBR 5738
Molding has four steps: take and record the sample, choose the consolidation method from the slump, fill the mold in consolidated layers and strike off the top. NBR 5738 (the Brazilian standard for molding and curing concrete test specimens) recommends that the person molding the specimens be qualified under NBR 15146-1 (the Brazilian standard for qualifying concrete testing personnel), because a badly molded specimen cannot be fixed afterward.
Sample and slump
The fresh concrete sample is taken according to ABNT NBR 16886:2020 (the Brazilian standard for sampling fresh concrete), which replaced NBR NM 33, the standard cited in the text of NBR 5738:2015. The laboratory records the date, the time water was added to the mix, where the concrete was placed, the time of molding and the slump. These records later make it possible to tell a concrete problem from a timing problem, such as a truck that waited too long on site.
Slump is the measure of the consistency of fresh concrete: how much a truncated cone of concrete settles under its own weight once the mold is removed, in millimeters. It is measured according to ABNT NBR 16889:2020 (the Brazilian slump test standard), which replaced NBR NM 67, or according to NBR 15823 for self-compacting concrete. The portion of concrete used for the slump test is discarded and does not go into the molds. NBR 5738 uses the slump to choose the consolidation method:
| Class | Slump A | Consolidation method |
|---|---|---|
| S10 | 10 ≤ A < 50 mm | mechanical |
| S50 | 50 ≤ A < 100 mm | mechanical or manual |
| S100 | 100 ≤ A < 160 mm | mechanical or manual |
| S160 | 160 ≤ A < 220 mm | manual |
| S220 | A ≥ 220 mm | manual |
The logic is the energy required. A dry, low-slump concrete does not settle under rod strokes and needs vibration. A fluid concrete settles almost by itself, and vibrating it would make the coarse aggregate sink and the paste rise, which is segregation. Self-compacting concrete needs no consolidation.
Manual consolidation: layers and strokes
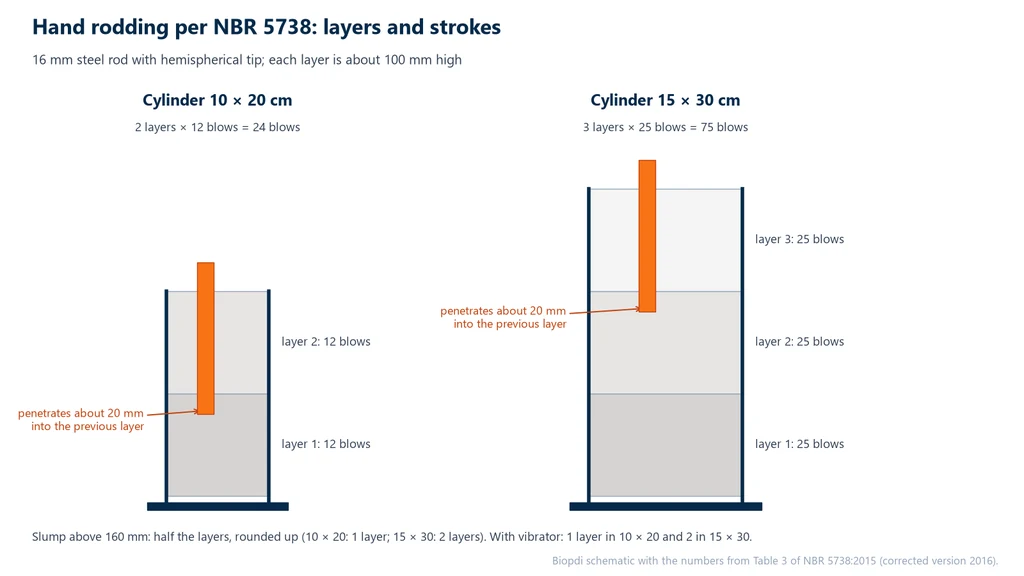
Consolidating means driving out the air trapped in fresh concrete: air left in the specimen lowers the measured strength, and a specimen with voids measures the molding, not the concrete. In manual consolidation, the tool is the tamping rod: a smooth steel bar, (16.0 ± 0.2) mm in diameter and 600 to 800 mm long, with a hemispherical tip. The concrete is placed with a U-section scoop, in layers of approximately equal volume, and each layer receives a fixed number of strokes from Table 3 of the standard:
| Test specimen | Layers, mechanical consolidation | Layers, manual consolidation | Strokes per layer (manual) |
|---|---|---|---|
| 100 mm cylinder (10 × 20) | 1 | 2 | 12 |
| 150 mm cylinder (15 × 30) | 2 | 3 | 25 |
| 200 mm cylinder | 2 | 4 | 50 |
| 250 mm cylinder | 3 | 5 | 75 |
| 300 mm cylinder | 3 | 6 | 100 |
| 450 mm cylinder | 5 | mechanical only | not applicable |
| 100 mm prism | 1 | 1 | 75 |
| 150 mm prism | 1 | 2 | 75 |
| 250 mm prism | 2 | 3 | 200 |
| 450 mm prism | 3 | mechanical only | not applicable |
The numbers in the table follow a logic that helps avoid mistakes. In manual consolidation of cylinders, the height divided by the number of layers always gives about 100 mm per layer (200/2, 300/3, 400/4, 500/5, 600/6), which is the depth the rod can consolidate. And the number of strokes grows with the cross-sectional area: from the 10 × 20 to the 300 mm cylinder, each stroke corresponds to between 6.3 and 7.1 cm² of the cross section, so the stroke density is practically the same in every size. This reading is ours, not the standard's, but it explains why the 15 × 30 takes more than twice as many strokes as the 10 × 20.
When the slump exceeds 160 mm, the concrete is already fluid enough that fewer layers are sufficient: the standard requires the number of layers to be halved, rounding up. The diagram below shows the two usual moldings in manual consolidation, with layers of about 100 mm and the rod passing through the top layer and entering about 20 mm into the layer below, which is what stitches one layer to the next.
The procedure, in our own words:
- Remix the sample so it is uniform and place the concrete with the scoop, moving it around the rim of the mold to distribute it symmetrically; level it with the rod before rodding.
- In the first layer, the rod goes through the full thickness, without striking the bottom of the mold, with the strokes distributed over the whole cross section.
- In the following layers, the rod goes through the layer and penetrates about 20 mm into the previous one.
- After each layer, tap the outside of the mold lightly until the holes left by the rod close.
- The last layer is overfilled so that, once consolidated, it fills the whole mold. Topping up the mold with concrete after the last layer has been consolidated is not accepted.
Consolidation with a vibrator
In mechanical consolidation, the internal (immersion) vibrator has a frequency of at least 100 Hz (6,000 vibrations per minute) and a vibrating element with a diameter between 19 mm and one quarter of the basic dimension for cylinders, or one third for prisms; the hose with the element must be at least 80 mm longer than the height of the mold (NBR 5738:2015, 4.3). Vibrating tables and external vibrators operate above 50 Hz, must hold the mold firmly and must allow the frequency to be controlled. The whole layer is placed in the mold before vibrating. With internal vibration, the last layer is placed to no more than 5 mm below the rim, and the vibration itself completes the mold; the standard allows the collar from the slump test to be used as an extension of the mold (7.4.3.2). In a cylinder, the vibrator is inserted only once per layer, at the center; in a prism, it is inserted perpendicular to the surface, at points roughly one edge length apart, avoiding the center. Vibration stops when the surface becomes relatively smooth and air bubbles hardly appear anymore. Overvibrating segregates the concrete. In the first layer, the vibrator must not touch the walls or the bottom; in the upper layer, it may enter about 20 mm into the previous one. It is withdrawn slowly, still running, so as not to leave a hole, and after each layer the outside of the mold is tapped lightly until the voids close.
Striking off and handling
After the last layer, the top is struck off: leveled with the rim of the mold using a metal straightedge or a mason's trowel. Ideally, the specimen is molded right where it will spend its first hours. If that is not possible, it is moved immediately after striking off, without jarring, impact or tilting, because the still-fresh concrete segregates and loses the shape of the top.
Initial curing, demolding and transport
Initial curing is the period in which the specimen stays in the mold, hardening. The molds stand on a rigid horizontal surface, free from vibration, in a place protected from the weather, covered with a non-reactive, non-absorbent material, such as a plastic sheet or plate, so the concrete does not lose water. The minimum period is 24 h for cylinders and 48 h for prisms. Earlier demolding is allowed in special cases, and the fact may be recorded in the test report.
Both numbers have a reason. In the first hours, the concrete is not yet strong enough to be handled: demolding too early chips the edges and can crack the specimen internally. The prism, longer and heavier, works in bending when lifted without continuous support, and that is why it waits twice as long. The cover exists because the water that evaporates from the top in the first hours is water missing for cement hydration, and it leaves a porous surface layer, precisely the one that will become one of the bearing surfaces in the test.
After initial curing, the acceptance specimens are demolded and identified before going to curing. If they have to travel to the laboratory, they go inside the molds, once hardened, or, already demolded, in rigid boxes with wet sawdust or wet sand. The goal is the same in both cases: keep the specimen from drying out or being knocked on the way.
Moist curing up to the test age
Final curing is the period during which the acceptance specimen stays, from demolding until testing, in a moisture-saturated environment at controlled temperature. Once demolded and identified, it goes immediately into one of two conditions and stays there until the test:
- saturated calcium hydroxide solution (lime-saturated water) at (23 ± 2) °C; or
- moist room at (23 ± 2) °C, with relative humidity above 95 %.
The specimens must not be exposed to dripping or running water, and stacking should be avoided. The temperature may be kept within other ranges provided in the standard, (21 ± 2), (25 ± 2) or (27 ± 2) °C, as long as it is recorded in the report. Moist rooms and curing tanks have their own requirements in ABNT NBR 9479 (the Brazilian standard for moist rooms and curing tanks).
Each detail protects the comparability of results. Cement only keeps hydrating when water is available, and the rate of hydration depends on temperature: two specimens of the same concrete, cured at 18 °C and at 28 °C, reach 28 days with different strengths. The lime in the water is there because concrete contains calcium hydroxide; in pure water, it dissolves and is carried out of the surface layers, and water already saturated with lime prevents this loss. Running water and dripping wash the surface for the same reason, and stacking keeps water from reaching all faces.
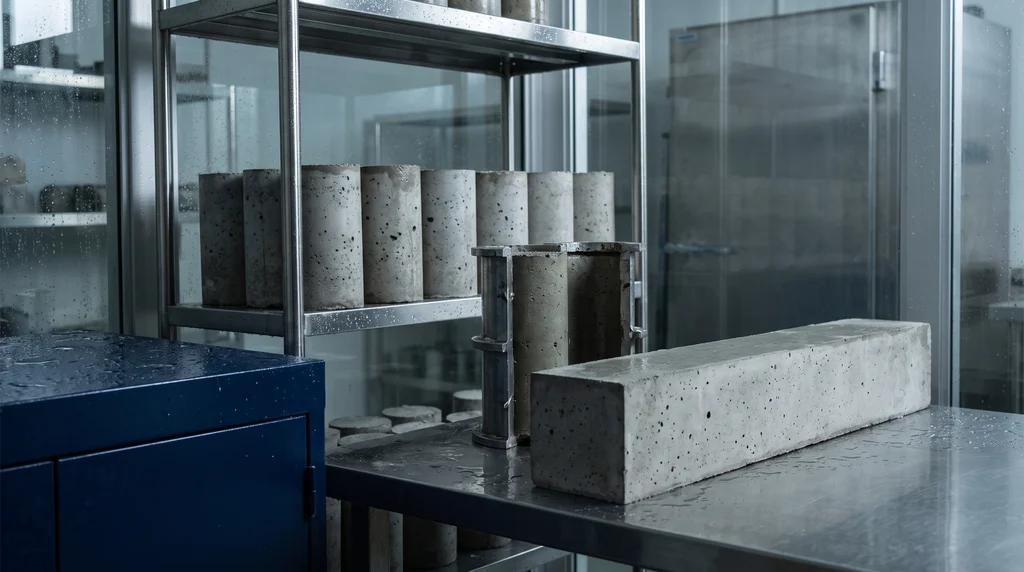
The photo shows a laboratory moist room: the concrete cylinders stay on the shelves until the test age, the open split steel mold shows how the specimen is demolded, and the prism on the bench is the specimen for the flexural tensile test.
Two exceptions complete the curing section of NBR 5738. Lightweight concrete leaves curing at 7 days and stays in air, at (23 ± 2) °C and relative humidity of (50 ± 15) %, until the test. And there is the specimen molded to verify the protection and curing on site: after demolding, it goes back onto the structure, near where the sample was taken, and receives the same protection and the same curing as the structure. For testing at 28 days, it stays at least 21 days on site; at other ages, at least three quarters of the test age; at the laboratory, it goes into the moist room until it is broken. This specimen answers whether the concrete in the structure is gaining strength under real conditions, which matters when deciding on formwork stripping, shoring removal or prestressing. It is not used for concrete acceptance, because it also measures the curing on site.
Preparing the ends: grinding and capping
Before the compression test, both ends of the cylinder must be flat and perpendicular to the axis. The struck-off top never comes out perfect, and an uneven end touches the machine platen only at a few points: the force concentrates there, and the specimen fails at the end before the concrete reaches its limit. NBR 5738 provides two processes:
- Grinding: mechanical removal of a thin layer from the ends with an abrasive tool, on a machine with a device that ensures perpendicularity. The surface is smooth, free of undulations and of any flatness defect that would affect the strength.
- Capping: a thin layer of an adherent material, chemically compatible with concrete, fluid when applied, smooth and flat once hardened, and with strength compatible with that of the concrete. It is applied with a device called a capping apparatus, which ensures perpendicularity, and the thickness must not exceed 3 mm on each end.
The standard describes requirements, not materials: sulfur is the traditional capping material, but any material that meets the requirements may be used. Other processes, such as unbonded neoprene pads, are allowed if they are first evaluated by statistical comparison with ground specimens and the results are compatible. The equivalent American standard, ASTM C1231/C1231M, governs these pads and does not allow them in acceptance testing of concrete below 10 MPa or above 80 MPa.
The 3 mm limit has two reasons. The first is stiffness: the capping material is more deformable than concrete, and a thick layer spreads sideways under load, creating tension at the edge of the end. The second is geometry: the height used in the test includes the capping, and the height-to-diameter ratio has a limit, as shown in the interpretation section.
Test age and breaking
Breaking the specimen, or testing it to failure, is the compression test of ABNT NBR 5739 (the Brazilian standard for concrete compression testing, equivalent to ASTM C39): the cylinder is loaded in a compression testing machine until it fails, and the maximum force divided by the cross-sectional area gives the strength fc. The age of the specimen counts from molding, not from arrival at the laboratory. The usual ages are 7 and 28 days: the 28-day age is the reference for fck and for acceptance; the 7-day age tracks strength development and anticipates problems, but does not accept or reject concrete. The design may specify other ages, such as 3 or 63 days. NBR 5739 gives a tolerance for each age:
| Test age | Tolerance |
|---|---|
| 24 h | ± 0.5 h |
| 3 days | ± 2 h |
| 7 days | ± 6 h |
| 28 days | ± 24 h |
| 63 days | ± 36 h |
| 91 days | ± 48 h |
For an age not in the table, the tolerance is interpolated. Between removal from curing and the test, the specimen must not dry out: NBR 5739 requires it to be broken right after leaving the moist condition. The diagram below brings together all the steps this article has explained so far, from molding to breaking, with the time limits of each one and an example of a breaking window for a specimen molded at 9:00 a.m. on October 1.
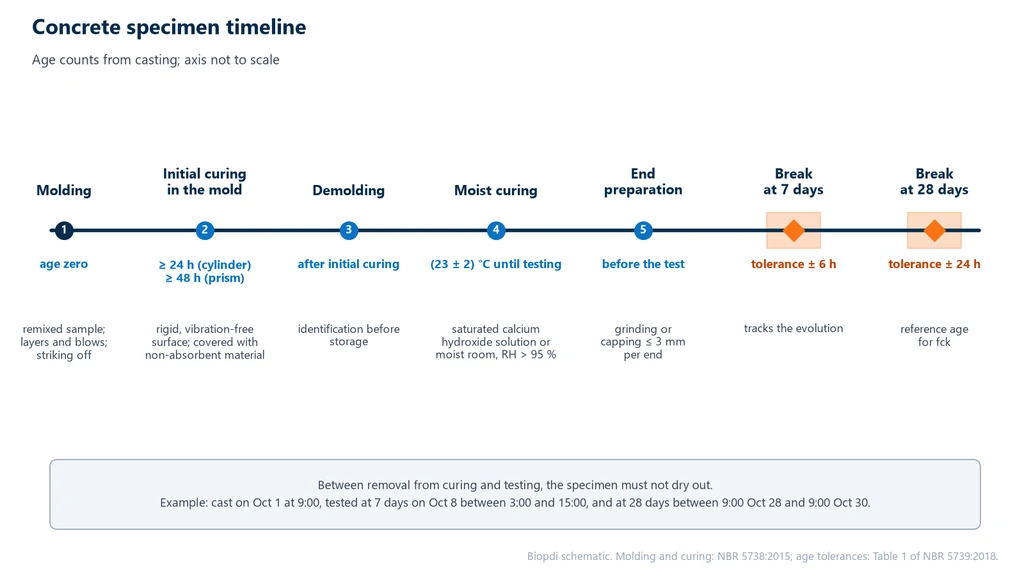
The details of the method are in the guide to the concrete compression test per NBR 5739: the cylinder is centered between the platens and loaded continuously, without shock, with the stress increasing at 0.45 ± 0.15 MPa/s until failure, and the strength is fc = 4F/(πD²), with F in newtons, D in millimeters and the result in MPa, reported to three significant figures. The guide also covers the requirements for the machine and platens, the force correction when the height-to-diameter ratio falls below 1.94, fracture types A to G and the content of the report.
Prism and splitting tensile test
Concrete is weak in tension, and pulling it directly is difficult, because the grip concentrates stress in a brittle material. For this reason, the tensile strength of concrete is measured indirectly, in two tests that use the specimens described in this article.
The 15 × 15 × 50 cm prism is broken in flexure according to ABNT NBR 12142:2010 (the Brazilian standard for the flexural tensile strength of concrete prisms). It rests on a 450 mm span and is loaded by two equal forces at the third points of the span, so the middle third is under constant bending moment and the prism fails at the weakest point in that region. The load is applied to the side faces as molded, with the prism rotated 90°, and the stress increases at 0.9 to 1.2 MPa/min. When the fracture occurs in the middle third, the flexural tensile strength is fct,f = F·ℓ/(b·d²). This is the strength that governs the mix design of concrete pavements and slabs on grade, which work in flexure. The theory behind the test is covered in the article on the flexural test.
The splitting tensile test, according to ABNT NBR 7222:2011 (the Brazilian standard for splitting tensile strength of cylindrical specimens), uses the same 10 × 20 or 15 × 30 cylinder, laid on its side between two fiberboard strips, 0.15 times the diameter wide and 3.5 mm thick, each used only once. Compression along two opposite lines of the cylinder surface puts the vertical diametral plane in tension, and the cylinder splits in half. The stress increases at 0.05 ± 0.02 MPa/s, and the strength is fct,sp = 2F/(π·d·ℓ). Both tests are detailed in the NBR 5739 guide mentioned in the previous section.
How many specimens to cast: test sample, lot and sampling
The question "how many specimens per m³ of concrete" has no answer in cubic meters, because NBR 12655 (the Brazilian standard for concrete preparation, control and acceptance) does not count volume: it counts test samples (exemplares) and lots. The rules below are those of NBR 12655:2015, as presented by ABCP (the Brazilian Portland Cement Association); the current edition is the 2022 one, which incorporated Amendment 1.
Test sample. This is the set of at least two specimens from the same batch (the load of one truck or one mixer), cast at the same time and tested at the same age. The strength of the test sample is the higher of the two values, not the average. The reason is that the concrete inside the two cylinders is the same, and defects in casting, curing or end preparation can only reduce the measured strength, never increase it; the higher value is the one closest to the real strength of that batch. Each test age requires its own test sample: when testing at 7 and 28 days, each sampled batch yields 4 specimens.
Lot. This is the portion of concrete evaluated as a whole. The lot is limited by the most restrictive of three criteria: a volume of 50 m³ in members under compression or combined compression and bending, or 100 m³ in members under simple bending; one floor; and 3 days of concreting, which may be spread over up to 7 days with interruptions.
With these two concepts, the standard provides for two types of control:
- Total sampling: every batch is sampled, each with its own test sample, and each test sample is compared with fck. There is no statistical estimate, because the entire population is known.
- Partial sampling: only some of the batches are sampled, chosen at random, and the lot needs at least 6 test samples from different batches for concrete up to 50 MPa, or 12 above that. From the test samples, the estimated fck (fck,est) is calculated, and the lot is accepted if fck,est ≥ fck.
In partial sampling, the calculation depends on the number of test samples n. With 20 or more, fck,est = fcm − 1.65·sd, using the mean and standard deviation of the lot, as shown in the compression test guide. Between 6 and 19 test samples, the values are sorted in ascending order, f1 ≤ f2 ≤ ... ≤ fn, and, with m = n/2 (discarding the highest value if n is odd):
fck,est = 2·(f1 + f2 + ... + fm−1)/(m − 1) − fm, not less than ψ6·f1.
The coefficient ψ6 is tabulated in NBR 12655 as a function of n and of the concrete preparation condition; for 6 test samples in condition A, the most tightly controlled, it is 0.92. The formula uses only the weaker half of the test samples, because what matters for fck is the lower tail of the distribution. Exercise 4 applies the calculation.
This is where the "4 to 6 specimens per truck" of jobsite practice comes from: in total sampling with testing at 7 and 28 days, there are 4 per batch (two test samples), and many jobsites cast an extra pair as a reserve. The reserve is a jobsite decision, not a requirement of the standard. Exercise 3 shows how the total number changes with the type of control and the structural member.
Worked examples
The exercises below apply, in order, specimen size, casting, quantity, acceptance and age. The data are examples prepared for this article.
1. Failure load and machine capacity. A laboratory receives cylinders of a C30 concrete and expects results of up to 40 MPa at 28 days. What is the maximum force on the 10 × 20 and the 15 × 30, and which capacity is adequate?
- Areas: A10 = π × 100²/4 = 7,854 mm²; A15 = π × 150²/4 = 17,671 mm².
- Forces at 40 MPa: F10 = 40 × 7,854 = 314,159 N, or 314.2 kN; F15 = 40 × 17,671 = 706,858 N, or 706.9 kN.
- Maximum strength each capacity can break, with no margin: 300 kN breaks the 10 × 20 up to 300,000/7,854 = 38.2 MPa and the 15 × 30 up to 17.0 MPa; 600 kN, up to 76.4 MPa and 34.0 MPa; 1,000 kN, up to 127 MPa and 56.6 MPa.
- Conclusion: for the 10 × 20 up to 40 MPa, 300 kN is not enough and the 600 kN machine is adequate with margin; for the 15 × 30 at 40 MPa, 1,000 kN is needed. A prism of the same concrete, in flexure, fails at around 30 to 40 kN (based on the dimensions of the setup) and fits a 300 kN flexural fixture with ample margin.
2. Layers in a flowable concrete. A concrete has a slump of 180 mm. How should the 15 × 30 and the 10 × 20 be cast?
- 180 mm falls in class S160 (160 ≤ A < 220 mm): manual consolidation (rodding).
- Above 160 mm, the number of layers is halved, rounding up. 15 × 30: 3/2 = 1.5, that is, 2 layers of 25 strokes. 10 × 20: 2/2 = 1 layer of 12 strokes.
3. How many specimens to cast. A 120 m³ slab of C30 is concreted in a single day, on one floor, with 15 trucks of 8 m³, and the specimens will be tested at 7 and 28 days.
- Total sampling: 15 batches × 2 ages × 2 specimens = 60 specimens.
- Partial sampling: the slab works in simple bending, so the lot goes up to 100 m³, and 120 m³ form 2 lots, for example of 8 and 7 trucks. Each lot needs 6 test samples from different batches; casting them for both ages: 2 lots × 6 test samples × 2 ages × 2 specimens = 48 specimens.
- If the same volume were for columns, the limit would be 50 m³, and the 120 m³ would become 3 lots of 5 trucks. With only 5 batches per lot, 6 test samples from different batches cannot be formed, and the way forward is to sample every batch, which brings us back to 60 specimens. Classifying the member is a design decision; the exercise only shows why there is no such thing as "specimens per m³".
4. Acceptance by partial sampling. A 45 m³ lot of C25, prepared in condition A, has 6 test samples at 28 days. The pairs, in MPa: (25.8; 26.1), (26.4; 27.0), (27.8; 27.1), (28.5; 28.0), (29.2; 28.6) and (30.4; 29.9).
- Value of each test sample, the higher of the pair, in ascending order: 26.1; 27.0; 27.8; 28.5; 29.2; 30.4.
- n = 6, so m = 3. fck,est = 2 × (26.1 + 27.0)/(3 − 1) − 27.8 = 53.1 − 27.8 = 25.3 MPa.
- Lower limit: ψ6·f1 = 0.92 × 26.1 = 24.0 MPa. Since 25.3 > 24.0, the value is 25.3 MPa.
- Since 25.3 MPa ≥ 25 MPa, the lot is accepted. Had the laboratory used the average of each pair, the lowest values would drop and the result could reject good concrete.
5. Testing window. A specimen was cast on October 1 at 9 a.m. At 7 days, the nominal age is October 8 at 9 a.m., and the ± 6 h tolerance opens a window from 3 a.m. to 3 p.m. that day. At 28 days, the nominal age is October 29 at 9 a.m., and the ± 24 h tolerance runs from 9 a.m. on October 28 to 9 a.m. on October 30. A 28-day specimen tested the following Monday, November 2, is outside the method.
How to interpret the result
The test report contains numbers, and most disputes between the jobsite, the ready-mix supplier and the laboratory arise from how they are read. These are the points where professionals most often go wrong.
It broke below fck: was it the concrete or the specimen?
First, separate what counts as an acceptance result. A single specimen, or a 7-day test sample, does not reject concrete: in total sampling, the 28-day test sample, taken as the higher value of the pair, is compared with fck; in partial sampling, the lot's fck,est. If the acceptance result is low, the investigation follows the path the specimen took: the difference between the two specimens of the test sample (a large difference indicates a defect in one of them, not in the concrete); the fracture type, since fractures close to the end, types F and G in NBR 5739 (the Brazilian standard for concrete compression testing), point to poorly prepared capping or ends; and the records of casting, initial curing, transport, curing temperature, age and capping. Only when the specimen is clear of suspicion does the doubt shift to the concrete. On the concrete side, the typical causes are the mix proportioning at the plant and water added on site to recover slump, which raises the water/cement ratio and reduces strength; that is why the delivery ticket, with the loading time, and the slump measured at casting are part of the investigation. In this case, NBR 12655 requires the structural designer to evaluate the structure with the value obtained and, if necessary, to extract cores according to NBR 7680-1 (the Brazilian standard for drilled concrete cores).
Why is the test sample the higher value and not the average?
Because both specimens came from the same batch at the same minute: the concrete is the same. What sets them apart is what happened afterward, and almost everything that can go wrong, such as an air void, water loss, an out-of-square end or a knock during transport, reduces the measured strength. No casting defect makes a specimen stronger than the concrete. Therefore, the higher value is the best estimate of the batch strength, and the average would penalize the concrete for a testing error. The scatter between the two, in turn, measures the quality of casting and testing, which Annex B of NBR 5739 turns into a laboratory performance indicator.
Do the 10 × 20 and the 15 × 30 give the same result?
Not necessarily. Both are permitted by the standard, but smaller specimens are less likely to contain a critical flaw, and the size effect tends to give slightly higher strength in the smaller cylinder. Some Brazilian studies have found the opposite trend, which shows that the difference depends on the concrete, the aggregate and the quality of casting. The practical consequence is not to mix sizes within the same control program and to keep the size specified by the contract and the design.
Why is curing at 23 °C and moist if the jobsite is not?
Because the acceptance specimen measures the concrete the ready-mix supplier delivered, not the curing done on site. If each specimen cured in the climate of its own jobsite, concrete delivered in winter would look worse than the same concrete delivered in summer. Jobsite curing has its own specimen, the one kept on the structure, and it answers a different question: whether the structure can already be stripped or prestressed.
Why can thick capping invalidate the specimen?
Because of the height-to-diameter ratio. NBR 5739 measures specimen height including the capping and does not accept a ratio above 2.06. A 10 × 20 mold of exactly 200 mm, capped with 3 mm on each end, reaches 206 mm, exactly at the limit. If the mold is at the extreme of the height tolerance of NBR 5738 (the Brazilian standard for casting and curing concrete specimens), 2% or 204 mm, even capping within the limit brings the height to 210 mm and the ratio to 2.10, outside the method; in that case, only grinding, which removes material, keeps the cylinder within range. Dimensional control of the molds and the capping limit are, together, what keep the cylinder within it.
Does the 7-day result predict the 28-day result?
Only as a trend, and for the same concrete. The fraction of final strength reached at 7 days depends on the cement type, the supplementary materials and the water/cement ratio, and none of the standards cited here sets a ratio between the two ages. A 7-day result below the history of that mix is a warning to watch the 28-day result, not a reason for rejection.
Common mistakes
The most frequent mistakes on site and in the laboratory, in the order of the specimen's path:
- Using the small mold with large aggregate. The diameter must be at least three times the maximum aggregate size.
- Topping up the mold after consolidating the last layer. The standard does not allow it; the last layer is placed with excess and struck off.
- Keeping the same number of layers in flowable concrete. Above 160 mm of slump, the number of layers is halved.
- Vibrating flowable concrete. In classes S160 and S220, consolidation is manual.
- Leaving the specimen in the sun, uncovered, during the first 24 h, or transporting it fresh. It loses water, cracks and arrives at the laboratory with a deformed top.
- Curing in running water, under dripping water or with specimens stacked.
- Letting the specimen dry between curing and testing.
- Capping with more than 3 mm per end or without a capping device. The end is out of square, and type F and G fractures appear.
- Using neoprene pads without the statistical comparison with ground specimens that NBR 5738 requires for other end-preparation methods.
- Testing outside the age tolerance. At 28 days, the window is ± 24 h.
- Averaging the test sample. The higher value applies.
- Treating "6 specimens per truck" as a standard requirement. The standard defines test sample and lot; the extra pair is a jobsite reserve.
- Using the field-cured specimen to accept the concrete. It measures the curing of the structure.
- Citing NBR NM 33 and NBR NM 67 as current. They were withdrawn in December 2020 and replaced by NBR 16886 and NBR 16889.
- Following an old PDF of NBR 5738. The strokes and layers for the usual sizes did not change, but the 2003 edition, even with the 2008 Amendment, called for aggregate up to one quarter of the basic dimension, selected the consolidation method by different slump ranges, allowed manual consolidation in the 450 mm cylinder and provided for finishing the top with cement paste. None of this applies in the 2015 edition.
- Confusing a concrete specimen with a cement or mortar specimen. Cement is tested in cylindrical specimens of standard mortar, according to NBR 7215; masonry and rendering mortar, in 4 × 4 × 16 cm prisms, according to NBR 13279.
Equipment for breaking concrete test specimens
A test specimen becomes a number in a compression testing machine. Biopdi manufactures two types of equipment for this. The electric and hydraulic concrete compression testing machine is dedicated to compression and handles routine cylinder breaking. The dual-column universal testing machine (UTM) uses one frame for three tests: cylinder compression with 300 kN compression platens, the splitting tensile test with the same platens and bearing strips, and four-point flexural testing of the prism with the 300 kN flexure fixture.
Capacity follows from Exercise 1: the 300 kN machine breaks a 10 × 20 cylinder up to about 38 MPa, with no margin left. Higher-strength cylinders and the 15 × 30 cylinder call for the 600 kN machine or the 1,000 kN machine. The load cell of the M2 line is class 1 according to ISO 7500-1 (ABNT NBR ISO 7500-1:2023 in Brazil). The class that goes into the NBR 5739 report (NBR 5739 is the Brazilian standard for concrete compression testing) is the class of the assembled machine, verified by the calibration laboratory. The BioLab software calculates fc, fct,sp and fct,f from the specimen dimensions and generates the report. Concrete fails suddenly and throws fragments, so operator protection follows NR-12 for testing machines (NR-12 is the Brazilian machinery safety regulation). The panel below shows the machine, the role of each part when testing concrete specimens, and the two accessories used.
The universal testing machine for breaking concrete test specimens
The dual-column M2 line ranges from 5 kN to 1,000 kN. When breaking concrete cylinders and prisms, each part of the machine has a job:
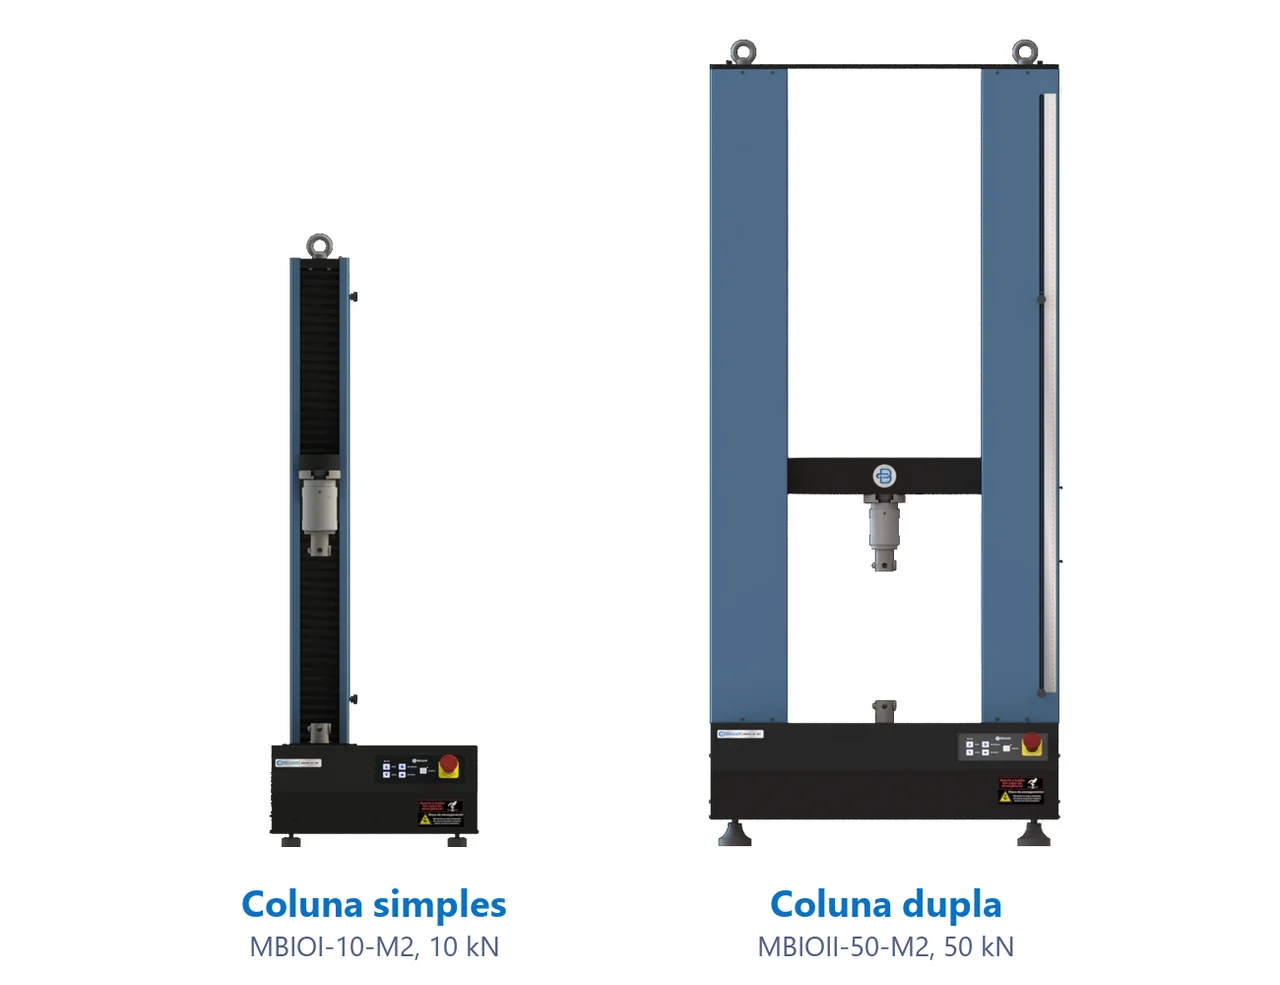
- Moving crosshead applies the load at the rate set by the standard
- Load cell measures the force, class 1
- Compression platens cylinder upright, or lying on its side between bearing strips
- Flexure fixture prism loaded at the third points
- BioLab software fc, fct,sp, fct,f and report
- Control panel and emergency stop positions the crosshead and stops the test
Fixtures for concrete test specimens
The fixtures below are mounted on the same machine, depending on the specimen and the test:
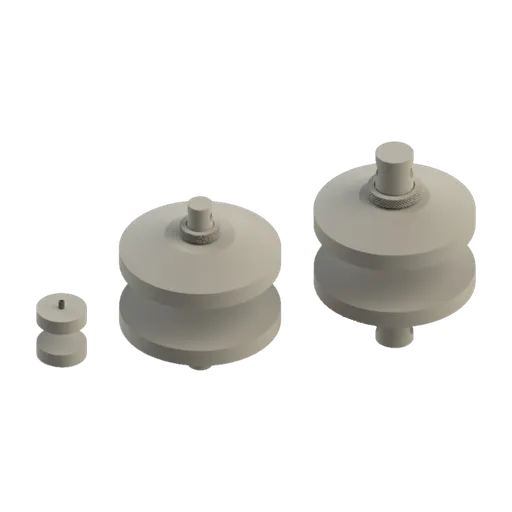
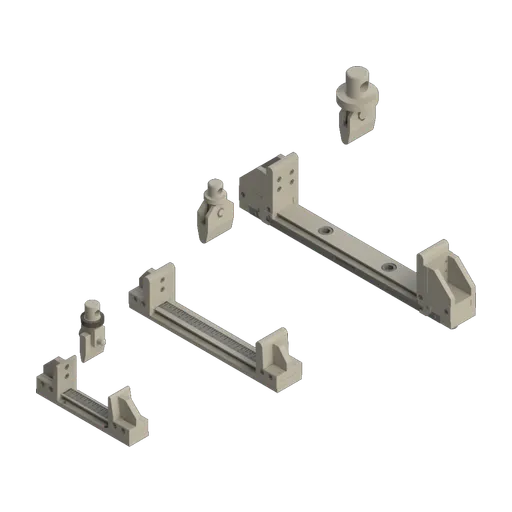
Biopdi manufactures the machines. Molding, curing and testing are the laboratory's job. To compare the models, see the universal testing machine guide. The configuration for each test is defined in the quote.
Standards cited: edition and status as of September 30, 2026
The table lists the standards cited in this article. We checked the edition and status on September 30, 2026: ABNT standards in the Target and Busca Normas catalogs (Brazilian standards databases), ASTM standards in the ASTM store. On October 1, 2026 we checked the current edition of NBR 5738, 5739, 12655, 12142, 16886, 16889 and 7680-1 again in the Target catalog, where we also read the full text of NBR 5738:2015. ABNT standards (Brazilian standards) are sold by ABNT and are not linked here.
| Standard | Subject | Edition and status |
|---|---|---|
| ABNT NBR 5738 | molding and curing of test specimens | 2015, corrected version of 06/2016 (Erratum 1), current, reaffirmed 04/2024 |
| ABNT NBR 5739 | compression testing of cylinders | 2018, current, reaffirmed 12/2023 |
| ABNT NBR 12655 | preparation, control, receipt and acceptance | 2015 with Amendment 1, edition of 02/2022, current |
| ABNT NBR 12142 | flexural tensile strength of prisms | 2010, current |
| ABNT NBR 7222 | splitting tensile strength | 2011, current |
| ABNT NBR 9479 | moist rooms and curing tanks | 2006, current, reaffirmed 01/2025 |
| ABNT NBR 16886 | sampling of fresh concrete | 2020, current, reaffirmed 01/2025 (replaced NBR NM 33) |
| ABNT NBR 16889 | slump test | 2020, current, reaffirmed 01/2025 (replaced NBR NM 67) |
| ABNT NBR 7680-1 | cores drilled from the structure | 2015, current |
| ASTM C31/C31M | making and curing specimens in the field (USA) | C31/C31M-26b, active |
| ASTM C1231/C1231M | unbonded caps (neoprene pads) | C1231/C1231M-23, active |
Other tests and technical references
Tests performed on the Biopdi universal testing machine

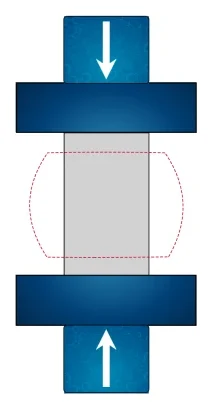

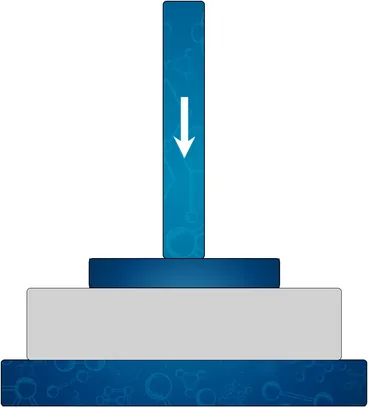
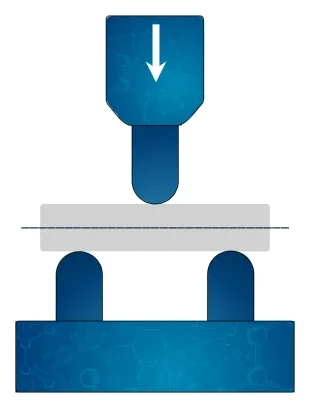

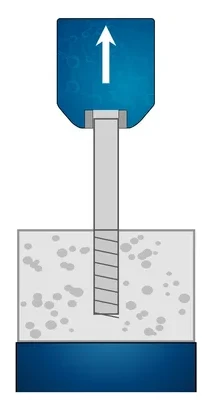







Related technical references
NBR 5739 concrete compression test: fc calculation and the NBR 7222, NBR 12142 and NBR 6136-2 standards
ABNT NBR 5739:2018 (the Brazilian standard for concrete compression testing), reaffirmed in 2023, covers compression testing of cylindrical concrete specimens: continuous loading at 0.45 ± 0.15 MPa/s until failure and fc = 4F/(πD²), in MPa, to three significant figures. See what it requires of the machine and the specimen, the h/d correction, failure types A to G and the related standards: NBR 7222 (splitting tensile test), NBR 12142 (flexural tensile strength) and NBR 12118, withdrawn in February 2026 and replaced by NBR 6136-2:2026.
ASTM D3039: tensile testing of composites, tabbed test specimens, chord modulus and failure modes
ASTM D3039 tensile test of polymer matrix composites: tabbed specimens, chord modulus from 1,000 to 3,000 µε and the failure code.
ASTM D638: tensile testing of plastics, Type I to V specimens, test speed and calculations
ASTM D638-22 is the ASTM method for the tensile properties of plastics up to 14 mm thick, using Type I to V dumbbell specimens. See dimensions, test speed, conditioning, extensometer, formulas, a worked example and the differences from ISO 527-2:2025.
Frequently asked questions
What is a concrete test specimen?
It is a sample of fresh concrete molded into a 10 × 20 or 15 × 30 cm cylinder, or a 15 × 15 × 50 cm prism. It is consolidated, moist-cured at (23 ± 2) °C and broken at a set age, usually 7 and 28 days, to measure the strength of the concrete delivered. In Brazil, molding and curing follow ABNT NBR 5738, and the compression test follows NBR 5739.
What are the area and size of the 10 × 20 test specimen?
The 10 × 20 cylinder is 10 cm in diameter and 20 cm high, with a cross-section of 78.54 cm² (7,854 mm²) and a volume of about 1.6 L. With 30 MPa concrete, it breaks at about 236 kN. The 15 × 30 cylinder has a 176.71 cm² cross-section, 2.25 times larger, and the usual prism measures 15 × 15 × 50 cm.
What is the standard for concrete test specimens?
In Brazil: ABNT NBR 5738:2015, reaffirmed in 2024, for molding and curing; NBR 5739:2018 for the compression test; NBR 12655, 2022 edition, for how many specimens to mold and for concrete acceptance; NBR 12142:2010 for the prism flexural test; and NBR 7222:2011 for the splitting tensile test.
How many test specimens per m³ of concrete?
There is no per-cubic-meter rule. NBR 12655 requires samples of two test specimens from the same batch for each age. With full sampling, each batch has its own sample. With partial sampling, each lot (up to 50 m³ in compression members or 100 m³ in members in simple bending) needs at least 6 samples. Breaking at 7 and 28 days, each sampled batch yields 4 test specimens.
How do you mold a concrete test specimen?
Remix the sample, place the concrete in the oiled mold in layers of equal volume and consolidate it. With hand rodding, use 2 layers of 12 strokes for the 10 × 20 cylinder and 3 layers of 25 strokes for the 15 × 30 cylinder, with a 16 mm steel tamping rod. The last layer is overfilled and struck off. Cover the mold and leave the specimen in it for at least 24 h, protected from vibration and the weather.
How many strokes does the 10 × 20 test specimen take?
With hand rodding, 12 strokes in each of the 2 layers, with the rod passing through the layer and about 20 mm into the layer below. If the slump is over 160 mm, the specimen is molded in 1 layer of 12 strokes. With a vibrator, the 10 × 20 cylinder is molded in 1 layer.
How long does the test specimen stay in the mold?
At least 24 h for a cylinder and 48 h for a prism, covered with a non-absorbent material, on a rigid surface and protected from the weather. It is then demolded, labeled and moved to a saturated calcium hydroxide solution or a moist room at (23 ± 2) °C until it is tested.
At how many days is a concrete test specimen broken?
The acceptance age is 28 days, with a tolerance of ± 24 h, and specimens are also commonly broken at 7 days, with ± 6 h, to track strength gain. The design may call for other ages, such as 3 or 63 days, each with the NBR 5739 tolerance. Age is counted from molding.
What does NBR 5739 say about breaking the test specimen?
ABNT NBR 5739:2018 (the Brazilian standard for concrete compression testing) defines the compression test of the cylinder: continuous loading, without shocks, at (0.45 ± 0.15) MPa/s until failure; a height-to-diameter ratio of at most 2.06, with a force correction below 1.94; an age tolerance of ± 24 h at 28 days; and fc = 4F/(πD²). It also classifies failures into types A to G. Types F and G, close to the end face, point to a defect in specimen preparation.
What mold is used for concrete test specimens?
A mold made of steel or another non-absorbent material that does not react with cement. It must be watertight, with a rigid base flat to within 0.05 mm, with no misalignment along the generatrices, and with periodic geometric checks of its dimensions. The height of a cylindrical mold is twice the diameter, with a tolerance of 1% on the diameter and 2% on the height. As for shape, NBR 5738 covers only the cylinder and the prism; the cube is the specimen of the European standard.
How much does a concrete test specimen cost?
It depends on what you buy: the mold, which is laboratory equipment, or the test, which is a service provided by a concrete testing laboratory. We do not quote prices. For the mold, what drives the cost is the material and how well it holds its geometry, which NBR 5738 requires to be checked periodically.
What is a prismatic test specimen?
It is a concrete beam with a square cross-section, usually 15 × 15 × 50 cm, tested in flexure over a 45 cm span with two loads at the third points, per NBR 12142, to measure flexural tensile strength. It is used in mix design and quality control of concrete pavements and floors, and stays in the mold for at least 48 h.
Is the sample result the average of the two test specimens?
No. Under NBR 12655, the strength of the sample is the higher of the two values, because defects in molding, curing and preparation can only lower the measured strength. A large difference between the two is a sign of a problem with the lower-strength specimen.
Can neoprene pads be used instead of capping?
NBR 5738 calls for grinding or capping of up to 3 mm per end face and allows other methods, such as unbonded neoprene pads, provided they are first evaluated by statistical comparison with ground specimens. ASTM C1231/C1231M does not allow these pads in acceptance testing of concrete below 10 MPa or above 80 MPa.