
Materials testing is the standardized procedure that measures the mechanical, physical, chemical or microstructural properties of a representative sample, or inspects a part without damaging it, in order to qualify the material, control quality, develop products and investigate failures. The result is a number or an accept/reject decision, obtained with the procedure of a standard and compared with the material or product specification.
Tests fall into five families: mechanical, non-destructive, metallographic, chemical, and physical or thermal. There is no single materials testing formula: each method has its own quantities and its own standard. This guide shows what each family measures, the difference between destructive and non-destructive testing, how the sample and the machine calibration decide whether the result is valid, a table that links the engineering question to the right test, and two practical cases, one of incoming lot inspection and one of failure analysis.
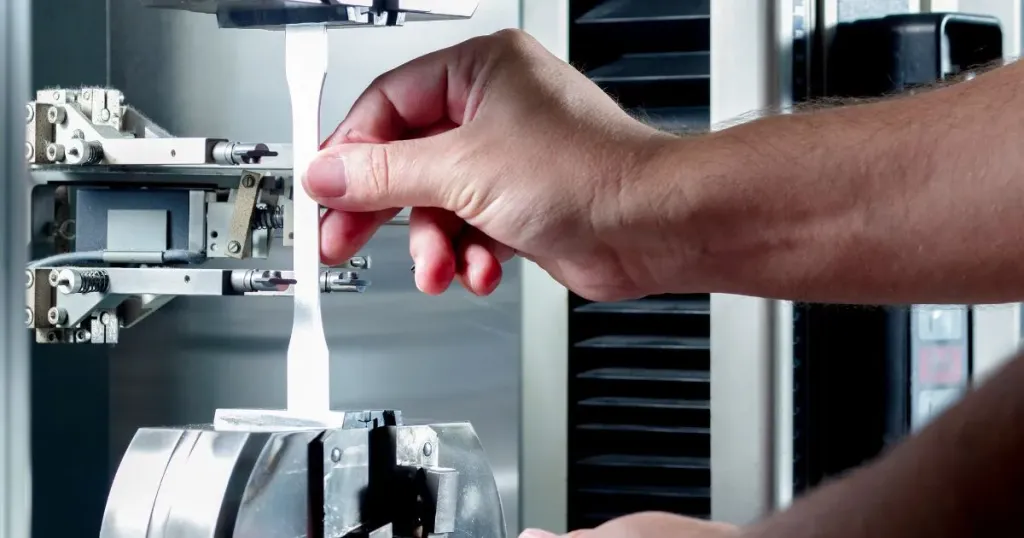
The photo shows the best-known test of the mechanical family being set up: the tensile test specimen is already clamped in the grips of the universal testing machine, and the extensometer, the sensor with thin arms resting on the central section, will measure the elongation directly on the material.
What materials testing is and what it is for
Testing means determining a characteristic of a material, component or product by following a defined procedure under controlled conditions. The key word is defined: the test standard sets the sample geometry, temperature, speed, equipment and calculation. Only then do two laboratories get the same number for the same material, and only then can the number be compared with a specification minimum. ISO/IEC 17025:2017 (ABNT NBR ISO/IEC 17025 in Brazil), which covers the competence of laboratories, starts from exactly this idea: testing is the technical activity of the laboratory, and what is assessed is whether it is performed in a reproducible and traceable way.
The test can be performed on a test specimen, which is a sample with a geometry defined by the standard, on a complete part or on a prototype. Some tests destroy the sample to measure a limit, such as the tensile test, which takes the specimen to fracture; others examine the part and return it to service, such as ultrasonic testing. This difference, which organizes much of the field, is covered in its own section further on.
"Ensaio" and "teste": what is the difference
In Brazilian technical Portuguese, ensaio is the standardized procedure, with a measurable and traceable result, that can go into a test report. Teste is the colloquial term and usually refers to a functional, pass/fail check: switching on a machine to see if it works is a "teste"; pulling a specimen to ISO 6892-1 (ABNT NBR ISO 6892-1:2024 in Brazil) and calculating its strength is an "ensaio". In English both ideas use the same word, test, which is where the confusion in translations comes from. No Brazilian standard defines "teste" as a technical term; method standards use "ensaio".
The five purposes of testing
The same methods serve different goals, and the goal changes how many samples are tested and how rigorously:
- Qualification and approval: approving a material, a supplier or a process, such as a welding procedure, before it goes into production.
- Quality control: at receiving inspection and in production, lot by lot, according to the product standard, which states which tests to perform and which minimums to meet.
- Research and development: characterizing a new material or measuring the effect of a heat treatment.
- Failure analysis: finding out why a part broke in service, which usually combines several test families.
- Certification and compliance: issuing a report from an accredited laboratory or a material certificate for a customer, a public tender or a regulatory body.
Types of materials testing: the five families
The most useful way to classify tests is by what they measure. Mechanical tests measure the response to a force: strength, stiffness, ductility, hardness, toughness. Non-destructive tests (NDT) look for discontinuities, such as cracks, pores and inclusions, without compromising the part. Metallographic tests reveal the structure of the metal on a cut and prepared section. Chemical tests determine composition. Physical and thermal tests measure density, thermal expansion and the transitions the material undergoes when heated.
A second way to classify, which crosses the first, is by the damage the test causes. The diagram below combines both: each row is what is measured and each column is how much the sample suffers. NDT methods alone occupy the "no damage" corner, hardness and spectrometry leave only a local mark, and most mechanical, metallographic and thermal tests consume the sample.
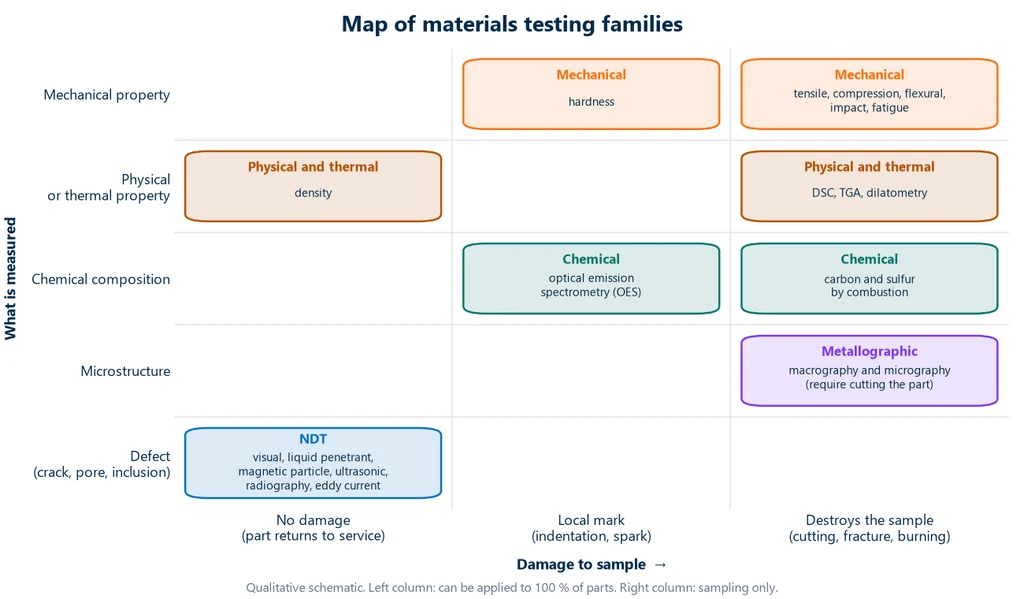
The column position determines the control strategy. What sits in the left column can be applied to every part produced; what sits in the right column can only be done by sampling, on sacrificed parts or specimens that represent the lot. The table summarizes the families, and the methods of each are described in the following sections:
| Family | What it measures | Typical methods | Damage to the sample |
|---|---|---|---|
| Mechanical | response to force: strength, stiffness, ductility, hardness, toughness | tensile, compression, flexural, hardness, impact, fatigue | local mark (hardness) or fracture |
| Non-destructive | discontinuities and thickness | visual, liquid penetrant, magnetic particle, ultrasonic, radiography, eddy current | none |
| Metallographic | macro- and microstructure: phases, grain, inclusions, layers | macrography, micrography | sample is cut |
| Chemical | chemical composition | optical emission spectrometry, combustion | local mark or sample consumed |
| Physical and thermal | density, thermal expansion, thermal transitions, mass loss | density, dilatometry, DSC, TGA | usually, a small sample is consumed |
Mechanical tests
Mechanical tests apply a controlled load and record the material's response. The main ones are the tensile, compression, flexural, bend, shear, torsion, cupping, hardness, impact, fatigue and creep tests. By loading rate, they are divided into quasi-static tests, in which the force increases slowly (tensile, compression, flexural), dynamic or impact tests, in which the load is applied in a single blow (Charpy), and cyclic tests, in which the load is repeated millions of times (fatigue).
The tensile test is the most widely used to characterize metals because, on its own, it gives the yield strength, the ultimate tensile strength, the elongation and, with an extensometer, the modulus of elasticity. Each mechanical test has its own article, and the guide to the main mechanical tests brings them all together, with what each one measures, the standard and the machine. The quantities they measure are covered in the article on the mechanical properties of materials.
Non-destructive tests
Non-destructive testing (NDT) is the examination that evaluates a part without impairing its later use; the terminology of the field is in ASTM E1316. NDT finds and sizes discontinuities, or measures thickness, and can therefore be applied to 100% of parts, including equipment in operation. Each method is based on a different physical phenomenon, and each phenomenon imposes a limit: no method works for everything. The six most widely used, from the simplest to the most elaborate:
- Visual: always the first. It requires good lighting and access to the surface, and may use a magnifier, mirror or camera. For welds, the procedure is in ISO 17637. It only sees what reaches the surface.
- Liquid penetrant: a low-viscosity liquid, red or fluorescent, enters the discontinuities by capillary action; after the excess is removed, a developer draws the liquid back to the surface and marks the crack. It only finds discontinuities open to the surface and does not work on porous material (ASTM E165/E165M).
- Magnetic particle: the part is magnetized, and a crack distorts the field and gathers the iron particles applied dry or in suspension. It detects surface and near-surface discontinuities, but only in ferromagnetic material: it does not work on austenitic stainless steel, aluminum or copper (ASTM E709). The part is demagnetized at the end.
- Ultrasonic: a probe emits high-frequency mechanical waves, which reflect off the back wall and off any internal discontinuity. It detects volumetric defects and measures thickness with access from one side only (ASTM E797/E797M, contact pulse-echo). It requires couplant between the probe and the part and a qualified operator to interpret the echoes.
- Radiography: X-rays or gamma rays pass through the part and record differences in thickness and density on film or a digital detector. It is volumetric and leaves a permanent record, which makes it common for welds and castings (ASTM E1742/E1742M). It requires radiation protection.
- Eddy current: a coil induces electric currents in the part, and surface cracks or variations in conductivity or coating thickness alter these currents (García-Martín, Gómez-Gil and Vázquez-Sánchez, Sensors, 2011). It only works on conductive material and is widely used on tubes (ASTM E426).
Other methods, such as acoustic emission, thermography and leak testing, complete the list, especially for composites, where ultrasonic testing and thermography are the most studied (Gholizadeh, Procedia Structural Integrity, 2016).
Two points are often misunderstood. First, NDT does not measure strength: it tells whether there is a crack and how large it is, but it does not give the ultimate tensile strength or the toughness. Second, the result depends on who performs it. That is why NDT personnel are certified by method and by level under ISO 9712:2021 (adopted in Brazil, identically, as ABNT NBR NM ISO 9712:2025). In Brazil, certification is carried out by ABENDI (the Brazilian Association of Non-Destructive Testing and Inspection), a body accredited by Inmetro (Brazil's national metrology and accreditation institute) for certification of persons under ISO/IEC 17024 (ABNT NBR ISO/IEC 17024).
Metallographic tests
Metallography examines the structure of the metal on a prepared section, and it is what explains why two parts made of the same steel have different properties. It works at two levels of magnification.
Macrography is performed on a ground and chemically etched section, observed with the naked eye or at low magnification. It shows segregation, the grain flow of a forged part, the zones of a weld and coarse porosity (ASTM E340). Micrography uses the microscope and follows a fixed sequence: cutting, mounting in resin, grinding with progressively finer grit, polishing to a mirror finish and chemical etching, which reveals grain boundaries and phases (ASTM E3 for preparation and ASTM E407 for etching). Under the microscope you see the phases, such as ferrite, pearlite and martensite, the inclusions, the case of a carburized part and the grain size, measured to ASTM E112.
Because it requires cutting, metallography is destructive for the sample. It is the link between process and property: micrography confirms whether a heat treatment produced the expected structure, whether the case of a carburizing treatment has the required depth, or whether the grains are elongated by work hardening. Each step has its own equipment: the metallographic cutting machine cuts the sample without heating it enough to alter the structure, the metallographic grinding and polishing machine performs grinding and polishing with speed and pressure control, and the metallurgical microscope performs the microstructural analysis.
Chemical tests
Chemical testing answers a simple and decisive question: is the material what the certificate says it is? For steels, the most widely used method is spark optical emission spectrometry (OES): a spark vaporizes a spot on the surface, and the light emitted by each element is separated and measured. ASTM E415 uses this to determine 21 alloying and residual elements simultaneously in carbon and low-alloy steels. The sample needs a flat face that seals the opening of the spectrometer stand, and the spark leaves only a small burn mark.
For more accurate carbon and sulfur values, chips of the sample are burned in an induction furnace and the gases are analyzed. Chemical methods are the first step when a part behaves poorly and a material mix-up is suspected.
Physical and thermal tests
This family measures properties that do not depend on force and that matter mainly for polymers, ceramics and composites:
- Density: by immersion, using Archimedes' principle; it reveals porosity and confirms the identity of plastics.
- Dilatometry: measures the coefficient of linear thermal expansion with a push-rod dilatometer (ASTM E228).
- DSC (differential scanning calorimetry): measures the heat absorbed or released on heating, which gives the glass transition, melting, crystallization and cure of polymers (ISO 11357-1:2023).
- TGA (thermogravimetric analysis): measures mass loss with temperature, typically from room temperature to 1,000 °C, and with it the volatile, filler and ash content (ASTM E1131).
- Electrical and thermal conductivity: complete the characterization when the part conducts current or heat.
Destructive and non-destructive tests
A destructive test renders the sample unusable, or deforms it so much that it cannot return to service, and in return measures a limit of the material: how much it can withstand, how much energy it absorbs, what its exact composition is. A non-destructive test keeps the part fit for use and in return only finds defects. One does not replace the other: destructive testing qualifies the material and the process by sampling, and NDT checks every part produced. The table compares the two:
| Criterion | Destructive | Non-destructive (NDT) |
|---|---|---|
| The part after the test | fractured, cut or deformed; does not return to service | intact, fit for use |
| What it measures | properties: strength, toughness, composition, microstructure | discontinuities and thickness |
| How many parts | samples per lot | up to 100% of parts, including in service |
| Examples | tensile, impact, fatigue, micrography, combustion | visual, liquid penetrant, magnetic particle, ultrasonic, radiography, eddy current |
| Reference | the standard for each method, such as ISO 6892-1 (ABNT NBR ISO 6892-1:2024 in Brazil) | ASTM E1316 (terms) and ISO 9712 (ABNT NBR NM ISO 9712 in Brazil) (personnel) |
Hardness is the borderline case. The indenter leaves only a small impression, and Callister and Rethwisch (Materials Science and Engineering, 10th ed., ch. 6) describe it as a relatively non-destructive test, because the part neither fractures nor deforms appreciably. Even so, hardness is not an NDT method under ISO 9712, and the mark can cause a polished functional surface to be rejected. The guide to mechanical tests discusses this classification, and the article on the hardness test gives the minimum thickness each method requires.
Test specimen, sampling and reliability of results
A perfect test on the wrong sample, in an uncalibrated machine, produces a worthless number. Three conditions make a result reliable: the sample represents the lot, the instrument measures correctly and the laboratory demonstrates competence.
Sample and test specimen
A destructive test does not measure the lot; it measures the sample, so the sample must represent the lot. ISO 377:2017 sets out the identification, location and preparation of samples and test specimens for mechanical testing of steel sections, bars, wire rod, flat products and tubes. Position matters: in a thick bar, the core cooled more slowly than the surface and has a different microstructure, and in a rolled plate the longitudinal direction gives a different result from the transverse direction. When the product standard specifies position and direction, it takes precedence.
Once taken, the sample is machined into a test specimen with the geometry required by the test standard, such as ABNT NBR ISO 6892-1:2024 (the Brazilian adoption of ISO 6892-1) or ASTM E8/E8M for tensile testing of metals. Machining must be done carefully: overheating the material during cutting or turning alters its microstructure and, with it, the result.
Calibrated machine
The force measured by the machine must be traceable to a standard. ABNT NBR ISO 7500-1:2023, equivalent to ISO 7500-1:2018, verifies the force-measuring system with a reference instrument and classifies the machine into classes 0.5, 1, 2 and 3. The main criterion is the relative accuracy error, q = (Fi − F) / F × 100, where Fi is the force indicated by the machine and F is the reference force; in each class, |q| must not exceed the class number, in %. In class 1, therefore, the permitted error is ±1.0%. ASTM E4, used in the United States, adopts a criterion of ±1% of the applied force, without a ladder of classes.
An example: with a reference force of 50.00 kN, the machine indicates 50.30 kN. Then q = (50.30 − 50.00) / 50.00 × 100 = +0.60%. The machine passes class 1 (±1.0%) and fails class 0.5 (±0.5%). Most test standards require class 1 or better, and verification is repeated periodically and always after a repair, a load cell replacement or a relocation of the machine.
Accredited laboratory and certified personnel
ABNT NBR ISO/IEC 17025:2017 (the Brazilian adoption of ISO/IEC 17025) sets out the requirements for competence, impartiality and consistent operation of testing and calibration laboratories. In Brazil, laboratories are assessed and accredited by Cgcre, the accreditation body of Inmetro (Brazil's metrology institute): accredited testing laboratories form the RBLE (Brazilian Network of Testing Laboratories), calibration laboratories form the RBC (Brazilian Calibration Network), and the listings are public. Three different certifications are often confused: laboratory accreditation (ISO/IEC 17025), certification of persons, such as NDT inspectors (ISO/IEC 17024 and ISO 9712), and product certification, which attests that a product complies with its standard.
How to choose the test
The starting point is not the equipment available but the engineering question. When a product standard exists (for a rebar, a tube, a structural section), it already states which tests to perform and which values to meet. When it does not, as in an investigation or a development project, the table below links the most common questions to the test that answers them:
| Question | Test | Reference standard |
|---|---|---|
| What are the strength and ductility? | tensile test | ABNT NBR ISO 6892-1:2024, ASTM E8/E8M |
| Is there a surface crack? | liquid penetrant; magnetic particle if ferromagnetic | ASTM E165/E165M; ASTM E709 |
| Is there an internal defect? | ultrasonic or radiographic testing | ASTM E797/E797M; ASTM E1742/E1742M |
| Is the steel the specified grade? | optical emission spectrometry | ASTM E415 |
| Was the heat treatment done right? | micrography and hardness profile | ASTM E3, ASTM E407; hardness test |
| Does it withstand impact at low temperature? | Charpy impact test | ASTM E23, ISO 148-1 |
| Does it withstand repeated loading? | fatigue test | material or component standard |
| At what temperature does the polymer soften? | DSC | ISO 11357-1:2023 |
Two rules complete the table. Choose a method compatible with the material, because magnetic particle testing does not work on austenitic stainless steel and eddy current testing does not work on insulating materials. And when the sample is unique, as with a failed part, start with the least destructive method, so as not to lose evidence that a later test would need.
Two practical cases
The two cases show how the test families combine. The numbers are illustrative and hypothetical: they do not correspond to a specific steel grade.
Case 1: accepting or rejecting a lot of bars
A lot of round steel bars arrives with the supplier's certificate, and the purchase specification, hypothetical, requires Rm of at least 520 MPa and elongation of at least 20%. The test plan checks the certificate in four steps:
- Composition: optical emission spectrometry (ASTM E415) to confirm that the grade matches the certificate.
- Hardness screening: the bar measures 168 HB. For steels, Callister and Rethwisch give the approximate correlation Rm (MPa) ≈ 3.45 × HB, so Rm ≈ 3.45 × 168 ≈ 580 MPa. This is only an estimate, indicating that it is worth proceeding; it does not replace the tensile test in the report.
- Tensile test: test specimen taken according to ISO 377 and tested to ABNT NBR ISO 6892-1:2024, with diameter d0 = 10.0 mm.
- Micrography: only if the specification calls for grain size (ASTM E112).
The tensile calculation starts from the cross-sectional area, S0 = π × 10.0² / 4 = 78.54 mm². For a proportional test specimen, the gauge length is L0 = 5.65 × √S0 = 5.65 × 8.862 = 50.07 mm, rounded to 50 mm. The machine records a maximum force Fm = 45.6 kN, and the final length between the marks, fitting the two fractured halves together, is Lu = 61.5 mm:
- Tensile strength: Rm = Fm / S0 = 45,600 / 78.54 = 580.6 MPa, above 520 MPa and consistent with the hardness-based estimate.
- Elongation after fracture: A = (Lu − L0) / L0 × 100 = (61.5 − 50) / 50 × 100 = 23.0%, above 20%.
With the composition confirmed and both tensile requirements met, the lot is accepted. The article on the tensile test details yielding, test speed and how to read the curve.
Case 2: investigating a broken shaft
A shaft fractured in service, and there is only one broken part. The rule is the one from the previous section: start with what does not destroy and move on to what cuts and breaks, preserving the evidence. The sequence below shows the seven typical stages, with the family of each and the increasing damage bar underneath:
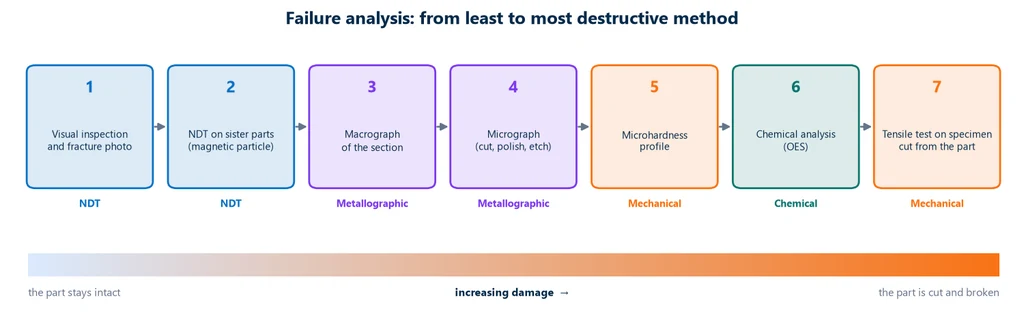
- Visual inspection and photography of the fracture. Concentric beach marks radiating from a single point indicate a crack that grew gradually, typical of fatigue.
- NDT on sister parts still in service, by magnetic particle testing if the steel is ferromagnetic, to find cracks before another part fails.
- Macrography of a section, to see the grain flow, the crack origin and any manufacturing defects.
- Micrography to check the microstructure and the depth of the hardened case.
- Microhardness profile on the same sample, from the surface to the core; the procedure is in the article on the hardness test.
- Chemical analysis to find out whether the material was the specified one.
- Tensile test on a test specimen taken from the part itself, if there is enough material.
Failure analysis is the case in which all five families work together, and it is also the best argument in favor of incoming inspection testing: many of the failures investigated this way end up traced to a material, a heat treatment or a case layer that a lot test would have rejected.
Materials testing standards
The product standard decides which tests are mandatory; the method standards say how to perform each one. The table lists the standards cited in this article, by family, with the current edition checked in September 2026:
| Family | Standard | Scope | Edition |
|---|---|---|---|
| General | ABNT NBR ISO/IEC 17025 | competence of testing and calibration laboratories | 2017 |
| General | ISO/IEC 17025 | competence of testing and calibration laboratories | 2017 |
| General | ISO 377 | location and preparation of steel samples and test specimens | 2017 (confirmed in 2022) |
| General | ABNT NBR ISO 7500-1 | force verification of tension and compression testing machines | 2023 |
| General | ISO 7500-1 | force verification of tension and compression testing machines | 2018 |
| General | ASTM E4 | force calibration and verification of testing machines | E4-24 |
| Mechanical | ABNT NBR ISO 6892-1 | tensile testing of metals at room temperature | 2024 |
| Mechanical | ASTM E8/E8M | tensile testing of metals | E8/E8M-25 |
| NDT | ASTM E1316 | terminology for nondestructive examinations | E1316-26c |
| NDT | ABNT NBR NM ISO 9712 | qualification and certification of NDT personnel | 2025 |
| NDT | ISO 9712 | qualification and certification of NDT personnel | 2021 |
| NDT | ISO 17637 | visual testing of fusion-welded joints | 2016 |
| NDT | ASTM E165/E165M | liquid penetrant testing, general industry | E165/E165M-23 |
| NDT | ASTM E709 | guide for magnetic particle testing | E709-21 |
| NDT | ASTM E797/E797M | thickness measurement by manual contact pulse-echo ultrasonic method | E797/E797M-21 |
| NDT | ASTM E1742/E1742M | radiographic examination | E1742/E1742M-23 |
| NDT | ASTM E426 | eddy current testing of seamless and welded tubes | E426-16(2021) |
| Metallographic | ASTM E3 | preparation of metallographic specimens | E3-26 |
| Metallographic | ASTM E340 | macroetching of metals and alloys | E340-23 |
| Metallographic | ASTM E407 | microetching of metals and alloys | E407-23 |
| Metallographic | ASTM E112 | average grain size | E112-25e1 |
| Chemical | ASTM E415 | carbon and low-alloy steel by spark atomic emission spectrometry | E415-21 |
| Physical and thermal | ASTM E228 | linear thermal expansion with a push-rod dilatometer | E228-22 |
| Physical and thermal | ISO 11357-1 | DSC of plastics, general principles | 2023 |
| Physical and thermal | ASTM E1131 | compositional analysis by thermogravimetry | E1131-25 |
The hardness, impact and fatigue standards are covered in the article on each test, starting from the guide to mechanical tests.
Biopdi equipment for materials testing
Biopdi manufactures equipment for two of the five families. For mechanical testing, the M2 line universal testing machine comes in 15 capacities, from 200 N to 1,000 kN, with class 1 force measurement according to ABNT NBR ISO 7500-1:2023. In it, the load cell measures force, the extensometer measures strain over the gauge length, and the BioLab software converts the force × displacement curve into stress × strain and issues the report. By changing grips and fixtures, the same machine performs tensile, compression, flexural, shear, cupping, pull-out and bond tests, and torsion and dynamic modules are available on request; how it works is explained in the article on the universal testing machine. For repeated loading, there is mechanical cycling.
In metallography, Biopdi manufactures the cutting machine, the grinding and polishing machine and the metallurgical microscope mentioned in the metallography section, which cover sample preparation and analysis. And beyond metals, the soil testing equipment, such as triaxial, CBR and Marshall, consolidation and direct shear, shows that materials testing also applies to soils and asphalt mixtures.
Other tests and technical references
Tests performed on the Biopdi universal testing machine




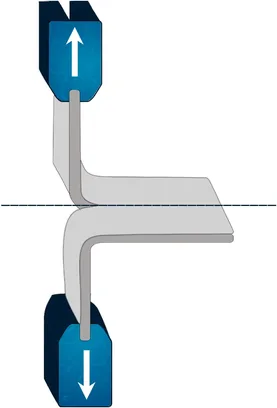
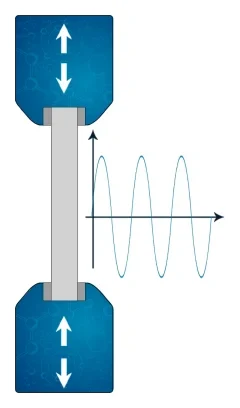

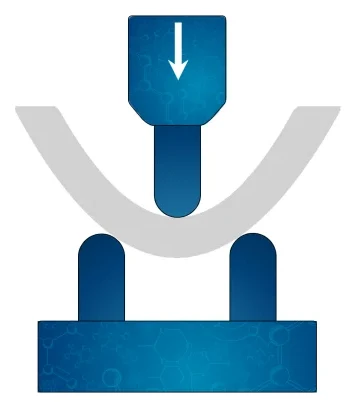
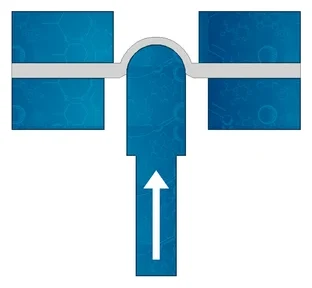
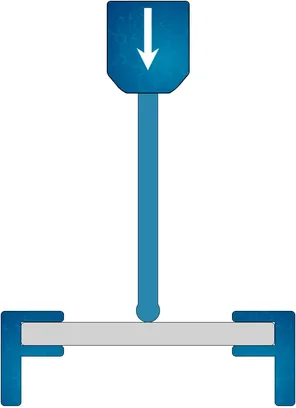
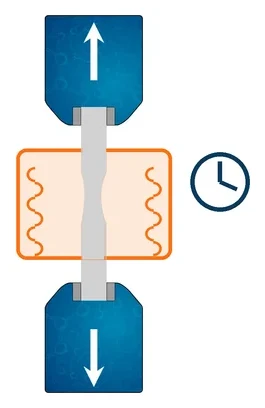


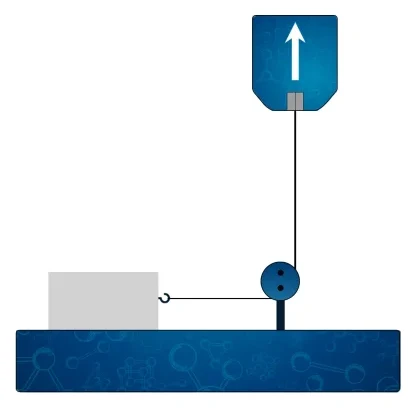
Related technical references
Mechanical testing: what it is, types, what each test measures and standards
Mechanical tests apply a controlled load to a test specimen and measure the material's response. See the types (destructive, non-destructive, static and dynamic), what each test measures, the standards and the machine for each one.
Destructive and non-destructive testing: differences, types and when to use each
Destructive tests break or mark the sample to measure properties; NDT finds cracks and pores without scrapping the part. Types and standards.
Test specimen: what it is, types by test and material, standards and dimensions
A test specimen is a sample whose shape and dimensions are set by the test standard. See types, standards and sizes for metal, plastic, concrete, wood and welds.
Frequently asked questions
What are the types of materials testing?
There are five families: mechanical (tensile, compression, flexural, hardness, impact, fatigue), non-destructive (visual, liquid penetrant, magnetic particle, ultrasonic, radiographic, eddy current), metallographic (macrography and micrography), chemical (optical emission spectrometry, combustion analysis) and physical or thermal (density, dilatometry, DSC, TGA). By the damage they cause, tests are also divided into destructive and non-destructive.
What are the test methods?
Each family has standardized methods, and each method has its own standard. Examples: tensile testing of metals per ISO 6892-1:2024 (ABNT NBR ISO 6892-1 in Brazil), ultrasonic thickness measurement per ASTM E797/E797M, metallographic preparation and etching per ASTM E3 and E407, composition of steels per ASTM E415 and thermal transitions of polymers per ISO 11357-1:2023. The product standard states which of these methods are mandatory.
What is the difference between "ensaio" and "teste"?
In Portuguese, "ensaio" is the standardized procedure, with a measurable and traceable result that can go into a test report, such as the tensile test of a specimen per ABNT NBR ISO 6892-1:2024. "Teste" is the colloquial term, usually for a pass/fail functional check. In English both ideas are "test", which explains the confusion in translations.
What is the difference between destructive and non-destructive testing?
Destructive testing renders the sample unusable or deforms it and, in return, measures properties such as strength, toughness and composition; that is why it is done by sampling, lot by lot. Non-destructive testing keeps the part in usable condition and looks for discontinuities, so it can be applied to every part, including parts in service. The two complement each other: one qualifies the material, the other checks each part.
What are the non-destructive tests?
The six most widely used are visual, liquid penetrant (ASTM E165/E165M), magnetic particle (ASTM E709), ultrasonic (ASTM E797/E797M), radiographic (ASTM E1742/E1742M) and eddy current (ASTM E426) testing. Acoustic emission, thermography and leak testing complete the list. Inspectors are certified per ABNT NBR NM ISO 9712 (the Brazilian adoption of ISO 9712).
Is the hardness test destructive?
It sits on the borderline. It leaves only a small indentation, and Callister and Rethwisch describe it as relatively non-destructive. But it is not an NDT method under ISO 9712, and the mark can cause a functional surface to be rejected, so it does not replace non-destructive inspection.
What is metallographic testing?
It is the examination of the metal's structure on a prepared section. Macrography uses an etched section, viewed with the naked eye or at low magnification (ASTM E340). Micrography uses a microscope after cutting, mounting, grinding, polishing and etching (ASTM E3 and E407), and reveals phases, inclusions, layers and grain size.
What is a test specimen?
It is the sample with geometry and preparation defined by the test standard, taken from a specific location in the product. For steel products, ISO 377:2017 defines where and how to take the sample; the geometry comes from the test standard, such as ABNT NBR ISO 6892-1:2024 for tensile testing.
What is an accredited laboratory?
In Brazil, it is a laboratory whose competence has been recognized by Cgcre/Inmetro (the Brazilian accreditation body) according to ABNT NBR ISO/IEC 17025:2017 (the Brazilian adoption of ISO/IEC 17025). Accredited testing laboratories form the RBLE (Brazilian Network of Testing Laboratories), calibration laboratories form the RBC (Brazilian Calibration Network), and the list is public.
Why does the testing machine need to be calibrated?
Because without force traceability the result is not valid for qualification. ISO 7500-1:2023 (ABNT NBR ISO 7500-1 in Brazil) classifies the machine into classes 0.5, 1, 2 and 3; in class 1, the permitted accuracy error is ±1.0%. Verification is repeated periodically and after a repair, a load cell replacement or a change of location.
Which standards govern materials testing?
Each method has its own: ABNT NBR ISO 6892-1:2024 for tensile testing of metals, ASTM E415 for composition of steels, ASTM E3 for metallographic preparation, ISO 11357-1:2023 for DSC, among others. The product standard is what defines which tests are required and the minimum values.